TABLE 2-1 Banner Elements
|
Button
|
Description
|
|
Returns you to the Sun Java Web Console page.
|

|
Displays the File System Manager software release and copyright information.
|

|
Refreshes the current page.
|

|
Logs you out of the Sun Java Web Console and the current application.
|

|
Opens the online help in a separate window.
|
|
Status Information
|

|
Displays the name and role of the user who is currently logged in to the software.
|
|
Displays the name of the management station system that is hosting the File System Manager software.
|

|
Displays the latest time that data was retrieved from the file systems that you are administering. The latest data is collected and displayed each time you refresh the browser window or perform an action in the browser.
|

|
Displays the current number of each type of unacknowledged fault on the server. There are four fault types:
 Down, Down,  Critical, Critical,  Major, and Major, and  Minor. Minor.
For more information about faults, see About Faults.
|
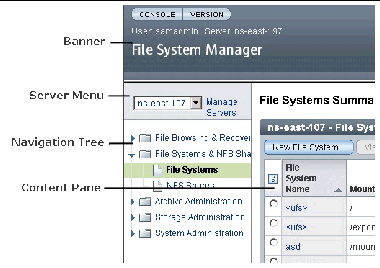
Reference: Content Pane Navigational Elements
The content pane is located below the banner of the application. It displays report information and enables you to enter data on forms. In addition, you can navigate through the pages of the application by using the navigational tree.
The following table describes the navigational elements that are displayed in the navigation tree.
TABLE 2-2 Navigational Elements
|
Navigational Element
|
Description
|
|
Current Server menu
|
Displays the server for which you are currently viewing information. To change the current server, select a new server from the drop-down menu.
|
|
Manage Servers link
|
Displays the Servers page, which provides a summary of the servers that you have added to the browser interface. Clicking a server on the Servers page takes you to the File Systems Summary page, from which you can manage the file systems on that server.
|
|
File Browsing & Recovery
|
Contains links to the File Browser and Recovery Points pages. The File Browser page displays a list of files and directories on the currently selected server, along with their size and current availability. The Recovery Points page shows any previously saved recovery point files for archiving file systems.
Use these links to initiate archiving, staging, releasing, or restoring operations on a per-file or per-directory basis for archiving file systems.
|
|
File Systems & NFS
|
Contains links to the File Systems Summary and NFS pages. The File Systems Summary page provides a summary of the file systems that are located on the selected server. You can create and administer file systems from this page. The NFS page allows you to share files through Network File System (NFS). It contains a list of file systems that are currently shared.
|
|
Archive Administration
|
Contains links to the Policies, Storage Recycling, General Setup, and Archive Activity pages. The Archive Policies Summary page provides a list of the current archive policies for the selected server. From this page you can configure and manage your archive policies. The other three pages provide additional tools for monitoring and configuring archiving on the selected server.
|
|
Storage Administration
|
Contains links to the Tape Libraries, Tape VSNs, Disk VSNs, and VSN Pools pages. These pages help you configure and manage tape libraries, volume serial name (VSN) pools, and tape and disk VSNs used for archiving the file systems.
|
|
System Administration
|
Contains links to a number of general management pages including System Details, Faults, Jobs, Scheduled Tasks, Monitoring Console, Email Alerts, and System Metrics. From these pages you can configure, schedule, and monitor the various activities on all of your managed servers.
|
Reference: Content Pane Icons and Buttons
The following table describes icons and buttons that are commonly displayed on reports and forms in the content pane.
TABLE 2-3 Icons and Buttons for Reports and Forms
|
Icon/Button
|
Description
|

|
Displays the top of a report or form
|

|
Displays the part of the report or form that is indicated by the text next to this icon
|

|
Indicates that the message is an error message
|

|
Indicates that the message is a warning message
|

|
Indicates that the message is informational in nature
|

|
Enables you to add the selected object to the browser interface
|
|
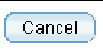
Exits a procedure without applying changes
|
|
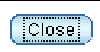
Closes the selected window or, from the Faults tab, closes the selected faults
|

|
Deletes the selected object from the File System Manager browser interface
|

|
Enables you to modify the selected object
|

|
Creates a new instance of an object
|
|
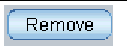
Removes the selected object from the browser interface
|

|
Sets all page elements to the original selections that were displayed when the page was first accessed
|

|
Saves the selections and entries that you have made
|

|
Applies the sort selections from the Advanced Sort window to the report table
|
A wizard is a tool that enables you to perform actions that are composed of multiple steps, such as creating a policy or file system.
Before you perform an action that opens a wizard, make sure your browser settings are correct. For more information, see Enabling Pop-Up Windows.
To use all the functions in the File System Manager application, you must have pop-up windows enabled. By default, the Mozilla web browser blocks pop-up windows.
To enable pop-up windows in the Mozilla web browser:
1. Launch a web browser session.
2. Choose Edit > Preferences.
The Preferences window is displayed.
3. In the Category pane, expand the Privacy & Security node.
4. In the Privacy & Security expanded list, click Popup Windows.
The Popup Windows settings are displayed in the right pane of the window.
5. Deselect the Block Unrequested Popup Windows check box, and click OK.
6. Close the web browser session and open a new session.
Pop-up windows are enabled in the new browser session.
Changing the Current Server
|
You can administer only one server at a time through the browser interface.
To change the current server, select the server you want to administer from the Current Server menu at the top of the navigation tree. The information on the page changes to reflect the newly selected server.
Certain reports and forms display report tables. This section provides information about how you control the display of tables and sort and filter the information that is displayed in report tables. It contains the following subsections:
Reference: Report Table Controls
Report tables have the following controls that enable you to manipulate the display of the tables and to work with items listed in the tables.
TABLE 2-4 Report Table Controls
|
Table Control
|
Description
|

|
Applies the selected operation to the objects that are selected on the current page of a summary report table or to the object displayed on a detailed report.
Note: Available operations in this menu vary, depending on the objects that are selected. If you are viewing this from a summary report, and one of the selected objects in the table cannot have a particular operation applied to it, that operation is disabled in this menu.
|

|
Indicates how many pages are in the report, and displays the page you are currently viewing. To view a different page, type the page number in the Page field and click Go.
|

|
Enables you to select the entries that you want to display. Click the button on the left to display the next 25 report entries. Click the button on the right to display the last 25 report entries.
|

|
Enables you to select the entries that you want to display. Click the button on the left to display the first 25 report entries. Click the button on the right to display the previous 25 report entries.
|
|
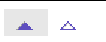
Indicates that the column in the report table is sorted in ascending order. The ascending sort order is by number, by uppercase letter, and then by lowercase letter.
If the icon has a gray background and a purple arrow, it indicates that this is the table's current ascending sort order.
Click the icon on the left to redisplay the table and re-sort the column in descending order. Click the icon on the right to redisplay the table and change the table's current ascending sort order.
|

|
Indicates that the column in the report is sorted in descending order. The descending sort order is by lowercase letter, by uppercase letter, and then by number.
A column that has the gray and purple version of this icon indicates that this is the table's current descending sort order.
Click the icon on the left to redisplay the table and re-sort the column in ascending order. Click the icon on the right to redisplay the table and change the table's current descending sort order.
|

|
Enables you to select or deselect all of the check boxes on the current page of the report table. Click the icon on the left to select all of the check boxes. Click the icon on the right to deselect all of the check boxes.
|

|
Click to deselect the selected radio button in the report table.
|

|
Opens the Advanced Sort window. Making the table sort selections and clicking Sort re-sorts the table with your selections. The ascending sort order is by number, by uppercase letter, and then by lowercase letter. The descending sort order is by lowercase letter, by uppercase letter, and then by number.
|

|
Enables you to toggle between displaying 1000 table rows one page at a time, and displaying 25 table rows one page at a time. When the top icon is displayed on a report table, click the icon to page through 1000 rows of data in the table. When the bottom icon is displayed on a report table, click the icon to page through 25 rows of data in the table.
|
|
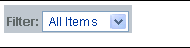
Enables you to display only the information that interests you in a report table.
|
Sorting Tables
To sort a report table:
1. Click the Advanced Sorticon ( ) in the table's banner.
The Advanced Sort window is displayed.
2. Select the columns that you want to sort.
3. Select the sort order you want, and click Sort.
Alternatively, you can sort the information in individual columns in ascending or descending order by clicking either the purple or white triangle in the column heading.
Filtering Tables
You can filter the contents of certain report tables so that only the information that interests you is displayed.
When filtering tables, keep the following in mind:
- A filter must have at least one defined criterion.
- A filter applies to the current server only. You cannot apply a filter to report tables across multiple servers.
- You can use filters with the sorting function to further narrow your results.
To filter a report table, choose the filter criterion from the Filter menu in the table.
To view additional information about the File System Manager software, click Help in the banner of the File System Manager browser interface. The help window consists of a Navigation pane on the left and a Topic pane on the right.
The following table describes the tabs in the help window.
TABLE 2-5 Help Window Tabs
|
Tab
|
Description
|
|
Contents
|
Click a triangle icon to display topics and subtopics. Click a topic page icon to display the help page for that topic in the Topic pane.
|
|
Index
|
Click the Index tab to display an alphabetized list of subjects. Click an index entry to display the help page for that topic.
|
|
Search
|
Click the Search tab and type the words for which you want to search in the Search field and press Enter or Return. The Navigation pane displays a list of topics that match your search criteria in order of relevancy. Click a topic link to display the help page for that topic.
|
The following table describes the buttons in the help window.
TABLE 2-6 Help Window Buttons
|
Button
|
Description
|

|
Click to return to the previous help topic that you were viewing.
|

|
Click to go forward to the next help topic that you viewed in the current session. This button is enabled only if you have clicked the Previous button.
|

|
Click to print the help topic that is displayed in the right pane.
|
|
Click to close the help window.
|